


Dear Beldians,
As part of the Beldex Hardfork 21 reconciliation process, we are providing an archival wallet RPC endpoint and an archive explorer that shows the pre-hardfork blockchain state. Users can use this endpoint to verify balances and transactions from the superseded (pre-hardfork) chain, assisting with reconciliation of deposits, withdrawals, and peer-to-peer transfers that occurred after the rollback block.
Please find the archive wallet RPC and archive explorer below:
RPC: archivexplorer.beldex.io:29092
Explorer: https://archivexplorer.beldex.io
Note: The Archive Wallet RPC is provided solely for viewing and verifying wallet balances and transaction history on the archived (pre-hardfork) chain. It is not connected to the canonical Beldex network and must not be used to initiate or broadcast transactions.
All new transactions should be performed using one of the standard live wallet RPC nodes, which are connected to the current canonical Beldex blockchain.
Step-by-Step: Adding the Archive Explorer Node
Step 1: Open the Beldex Wallet
Launch your Beldex wallet application.
Step 2: Head to Settings
From the main wallet interface, click on Settings.

Step 3: Go to Wallet Settings → Nodes
Under Settings, navigate to Wallet Setting.

Step 4: Select Current Nodes
Then select Current Nodes. Here you’ll see a list of the 5 default RPC nodes that come pre-configured with the wallet.

Step 5: Add a New Node
Look for the option to Add New Node (+) and click it. A prompt will pop-up asking for the node’s details.

Step 6: Fill in the Node Details
Enter the following information:
Node: archivexplorer.beldex.io
Node Port: 29092
Node Name: “Beldex Archive Node”
Node Operator Name: (optional — your name or handle)
Password: (optional)
Step 7: Test the Connection
Before adding it to your wallet RPC list, click TEST. This pings the node to confirm it’s reachable and responding correctly. If the test is successful, you’ll see a confirmation that the node is live.

Step 8: Add the Node
Once the test passes, click Add. The Archive Explorer node will now be saved to your list of available nodes.

Step 9: Select the Archive Node from the List
Back on the Nodes screen, you’ll now see archivexplorer.beldex.io:29092 added to the bottom of your node list, alongside your original 5 public nodes. Tap on it to select it as your active node.
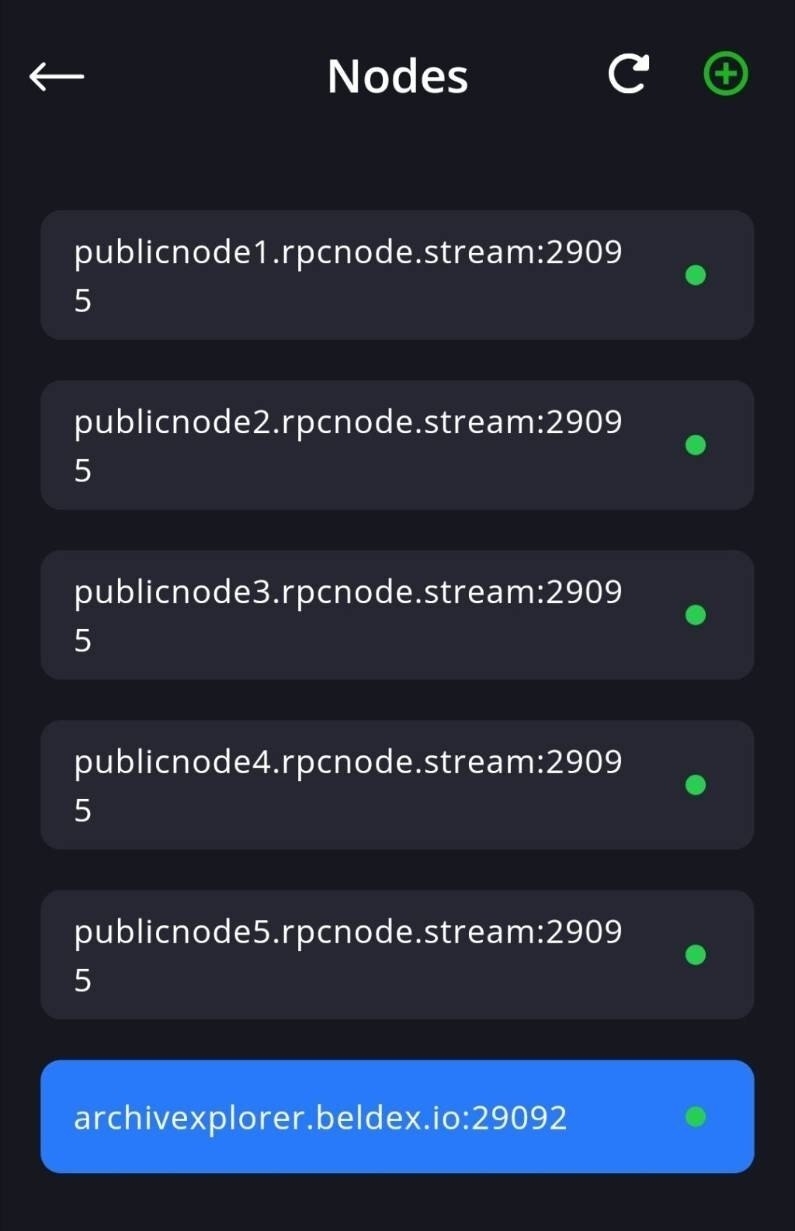
Step 10: Confirm the Switch
A confirmation pop-up will appear asking: “Are you sure to change the current node to archivexplorer.beldex.io:29092?” Click Ok to confirm.

Step 11: Verify the Node Has Changed
Head back to Wallet Settings. Under the Nodes section, the current node should now display archivexplorer.beldex.io:29092 in green, confirming your wallet is successfully connected to the Archive Explorer node.

By successfully connecting to the Archive Wallet RPC, you can view your wallet balance and transaction history as they existed before the Hardfork 21 state rollback.
This provides a reliable reference when verifying deposits, withdrawals, or peer-to-peer transfers that occurred after the rollback point.
Once you have completed your verification, you can switch back to any of the standard public RPC nodes to continue using the Beldex network as usual. It is necessary to switch back to the public RPC nodes to initiate transactions. Transactions initiated via the archive RPC node will not go through or be confirmed.
If you require further assistance with reconciliation, please contact the Beldex support team via our official channels.
 Listen

 back to blog